Yoga for Lower Back Pain: A Gentle, Safe Sequence for Everyday Relief
Struggling with a stiff, sore lower back can make even small tasks feel heavy. This guide offers approachable yoga for lower back pain — a 15–25 minute, gentle sequence designed for beginners, desk workers, older adults, and anyone with non-specific low back discomfort.
This is meant to help you build everyday relief and resilience through slow movement, breath, and simple strength — not to replace medical care. If you have sharp pain, numbness, or progressive weakness, please pause and consult a clinician before practicing.
How yoga for lower back pain helps: gentle principles to guide your practice
A safe practice balances three things — mobility, stability, and nervous-system soothing. Thinking of your back this way helps you pick movements that relieve tension without stressing sensitive tissues.
Concept — mobility, stability, and nervous-system soothing
Mobility is about usable range — gentle twists, small back bends, and hamstring length that allow bending and rotation without guarding. These movements restore comfortable motion where stiffness has set in.
Stability is the ability to move from a supported centre. Small, local muscle engagement around the pelvis and low back — not hard bracing — gives the spine safer mechanics as you go about your day. Slowly building this support helps prevent repeating the same strain.
Nervous-system soothing is often overlooked. Breath-paced, slow movement down-regulates protective tension. When your nervous system feels safer, muscles relax, circulation improves, and healing has room to happen.

Tip — when to choose rest, gentle movement, or a doctor
Use comfort and function as your guide. When pain is dull, achy, or stiff, gentle movement usually helps. Short, low-intensity sessions often reduce guarding and improve mobility within minutes.
Rest is appropriate for sharp, escalating pain or when a movement clearly makes things worse. If you notice numbness, pins-and-needles into the leg, sudden weakness, or changes in bladder/bowel control, stop practicing and seek medical attention promptly.
When in doubt, err on the side of gentleness. A clinician can help rule out red flags and provide tailored guidance so your practice supports recovery safely.
Safety & Alignment Basics Before You Begin
Before you move, set a few simple alignment and breathing cues. They keep practices restorative rather than reactive. The goal is ease — not pushing to a limit.
Why — core engagement and pelvic neutrality protect the spine
A neutral pelvis is a small, balanced position — not flattened or over-arched. Think of the tailbone and pubic bone aligning on the same plane; that takes pressure off passive structures and lets muscles support movement.
Core engagement here is gentle: imagine drawing the lower belly slightly toward the spine on an exhale, enough to feel light support but not to hold the breath or tuck forcefully. This micro-engagement stabilizes the low back during bending and lifting.
These cues reduce the tendency to hinge from a vulnerable spot and create safer movement patterns you can carry off the mat into daily activities.
How — simple prop setup (blanket, strap, block) for comfort
Props let you access the benefits of a pose without overstretching or straining. A folded blanket under the sacrum softens bridge work and removes sharp contact under the low back. A strap around the feet in supine hamstring work keeps the neck neutral and prevents compensatory reaching.
A block under the hands in standing or downward-facing variations raises the floor toward you, so the low back doesn’t have to overreach. These small changes let you feel length and support at the same time.
Set up your props before you begin so transitions stay smooth — comfort is part of the practice.
- Blanket folded under sacrum for supported bridge and extra cushioning.
- Strap looped around foot in supine hamstring stretches.
- Block under hands in modified downward dog or half-pike to reduce reach.
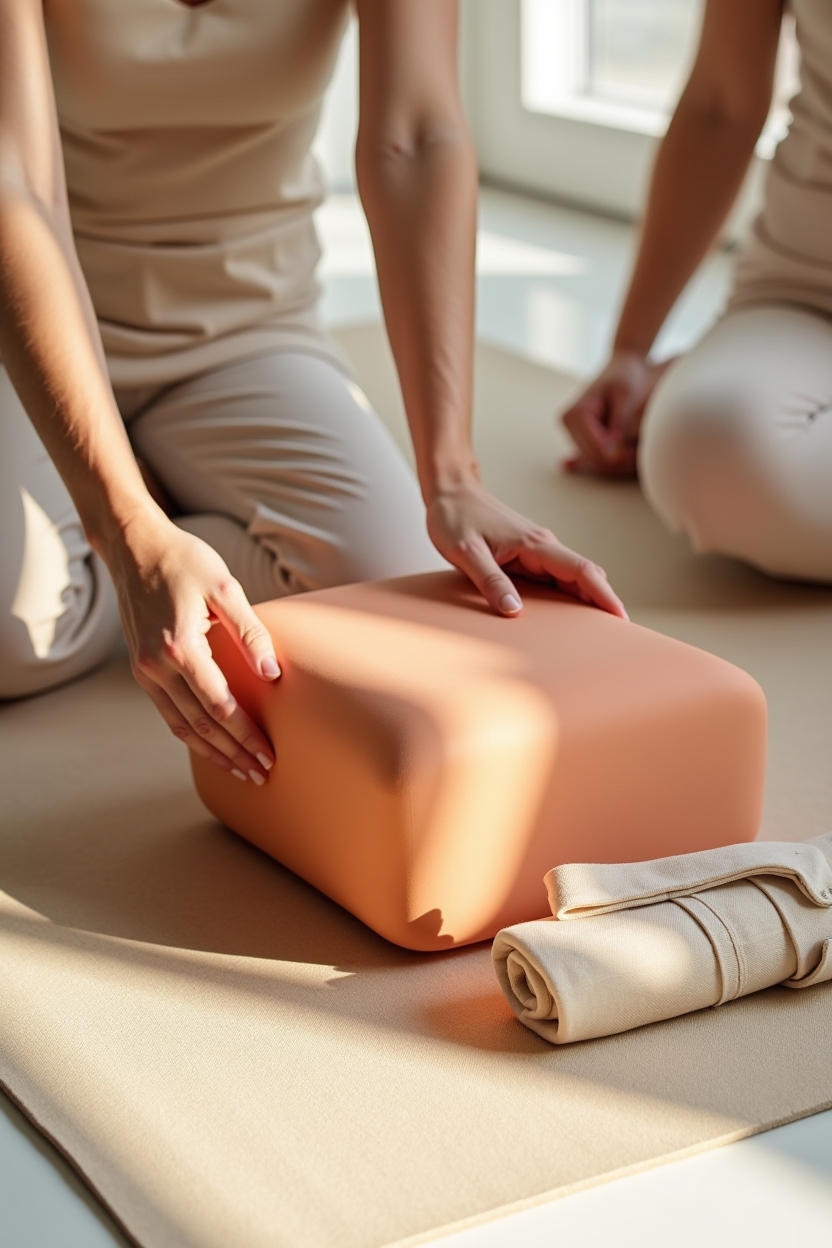
A Gentle Sequence: yoga for lower back pain (15–25 minutes)
This sequence flows from waking the pelvis, to gentle spinal mobilizers, to short strengthening, then to integrated lengthening and calming. Move with breath and stop if any sharp pain appears.
Warm-up — Pelvic Tilts (why + how + 3 progressions)
Pelvic tilts are a small, foundational movement that wakes the low back and pelvis without loading the spine. They help you sense the neutrality described earlier and invite coordinated breath with movement.
Start supine with knees bent, feet hip-width. On an exhale, draw the lower belly gently toward the spine and tilt the tailbone down, flattening the small of your back into the mat. Inhale to release back to a neutral curve. Keep the neck soft.
Progress slowly when it feels easy: increase range a little, try seated versions to practice in upright posture, or perform a standing tilt while bending and straightening the knees.
- Supine small tilts: 8–12 slow reps with breath.
- Seated tilts: hands on hips, gentle rocking to find neutrality.
- Standing hip hinge with bend: mini-tilts while sliding hands down thighs.
Mobilizer — Cat/Cow with breath (why + how + timing)
Cat/Cow coordinates spinal flexion and extension with inhale and exhale to increase mobility and calm the nervous system. The rhythm itself is regulating — slow, predictable movement signals safety to the body.
Begin on hands and knees with knees under hips and hands beneath shoulders. Inhale to lift the chest and tailbone (gentle arch, Cow). Exhale to round the spine and tuck the tail (Cat). Move slowly; let each breath find a comfortable range.
Timing: aim for 6–10 rounds, moving only as far as comfortable. Pause where you feel a pleasant release and breathe two or three cycles before continuing.
- Set a slow rhythm: 4–6 seconds per inhale/exhale.
- Repeat 6–10 coordinated rounds, pausing where you feel ease.
- Use small ranges — the quality of movement matters more than depth.
Mobilizer — Thread-the-Needle (why + how + cues for safety)
Thread-the-Needle is a gentle lumbar rotation that releases tension between the lower ribs and pelvis. Rotation is often more helpful than aggressive side-bending for back stiffness because it uses supported torque rather than isolated bending.
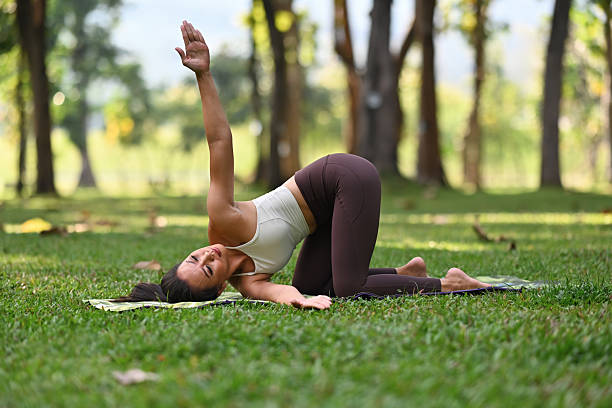
From hands and knees, slide your right arm underneath the left, lowering your right shoulder and cheek toward the mat while your left hand may remain planted or reach overhead. Keep the hips square and move only until you feel a comfortable stretch.
Safety cues: avoid forcing the shoulder to the floor, keep the neck neutral, and use a folded blanket under the shoulder if it doesn’t reach comfortably. Stop if you feel sharp pain in the low back or down the leg.
- Keep hips level — rotate from the thoracic and lumbar junction, not by dropping a hip.
- Use a blanket under the shoulder if the torso doesn’t comfortably reach.
- Limit range if you feel any radiating feeling down the leg.
Stability — Bridge Pose with micro-engagement (why + how + variations)
Bridge builds the posterior chain (glutes and hamstrings) that supports the low back. Done with micro-engagement and brief holds, it strengthens without compressing the spine.
Lie supine with knees bent, feet hip-width. On an exhale, press down through the heels, lift the hips a few inches while gently activating the glutes and lower belly. Hold for 2–6 breaths and lower with control. Avoid overarching — aim for a long line through the front of the body.
Variations: lift just a few inches for a gentler option; place a block between the knees to encourage hip alignment; use a folded blanket under the sacrum for a supported bridge that stays restorative.
- Supported bridge: blanket under sacrum, relax into the lift for 6–10 breaths.
- Micro-lift: small elevation with 2–4 breath holds, 6–8 reps.
- Bridge with block between knees: focus on glute activation and alignment.
Integration — Modified Downward Dog to Half-Pike (why + how)
This flow lengthens the back of the body while letting you control hamstring tension — important because aggressive hamstring pulls can tug on the low back. Keeping a soft bend in the knees prevents overload.
From hands and knees, tuck toes and lift hips back into a gentle downward-facing position with knees bent (modified Downward Dog). Pause to breathe, then shift hips slightly back and lower the chest toward the thighs for a half-pike feeling.
Keep the knees bent as needed and use blocks under the hands to raise the floor toward you. The idea is a gradual lengthening — not a full straight-legged stretch — so the low back stays comfortable.
Release — Reclined Twist and Supported Child’s Pose (why + how)
Twists and supported child’s pose help integrate movement and soothe the nervous system after activation work. Gentle rotation helps distribute mobility and leaves the low back feeling longer.
Recline and hug knees to chest, then let both knees fall to one side while keeping both shoulders relaxed to the floor. Hold for several breaths, then switch. For child’s pose, use a bolster under the chest or blanket under hips for sensory comfort and ease.
Finish with a short Savasana — **Savasana** means a restful supine pose where you allow the breath and nervous system to settle. Stay 2–5 minutes, focusing on soft, natural breathing.
Modifications and Props for Sensitivity or Injury
Sensitivity varies day to day. A few reliable modifications let you practice consistently while keeping sensations within a tolerable range.
How — using props to offload and support
Props are not a crutch — they’re a tool that lets you feel the shape of a pose with less strain. For example, placing a bolster or folded blanket under the sacrum in bridge removes pressure from lumbar facets while still training the hips and glutes.
Blocks under hands in modified downward dog shorten the lever arm and protect the low back. A strap around the foot in supine hamstring stretches keeps the neck and shoulder relaxed, preventing compensation that would tug on the lumbar spine.
Choose props that allow you to feel stable and safe; if a setup still provokes sharp or spreading pain, back off and try a different variation.
- Bolster or folded blanket under sacrum for supported bridge.
- Block under hands to raise floor in forward-lengthening poses.
- Strap around foot in supine hamstring work to keep the neck neutral.
Tip — pacing, micro-rests, and pain-scaling
Use a simple 0–10 pain scale to guide intensity: 0 is no pain, 3 or below is generally safe for gentle work, and anything above 5 suggests backing off. Track sensations rather than pushing through them.
Pacing matters — do shorter sessions more often rather than one long session. Micro-rests between repetitions (5–10 seconds) let tissue recover and prevent cumulative irritation.
If a movement causes sharp, radiating, or worsening pain, stop and consult a clinician. Adjustments are part of practice — sensitivity is not a failure.
- Check-in: rate discomfort before, during, and after practice (0–10).
- Keep within a comfortable range; avoid increases that linger after practice.
- Use micro-rests and shorter daily sessions for steady progress.
Daily Practices & Lifestyle Small Shifts: yoga for lower back pain beyond the mat
Your mat work is a foundation — small habits throughout the day multiply its effect. These micro-practices and movement hygiene tips reduce the load on your low back.
Step — 3-minute desk mobility break
A short break every 45–60 minutes interrupts the stiffness that comes from sitting. This three-minute sequence reconnects breath and movement and helps reset pelvic position.
Stand, inhale to reach arms overhead and lengthen the spine, exhale to fold forward with knees soft for a gentle hamstring rasp. Walk hands up thighs to a mini half-pike or place hands on a chair to shift the hips back and open the back-of-body. Finish with a few shoulder rolls and a gentle pelvic tilt to find neutral.
Do this sequence twice a day or whenever you feel prolonged stiffness. These small moments of mobility add up and are a core part of gentle yoga for back pain.
- 1 minute: stand and reach overhead, then exhale to fold with soft knees.
- 1 minute: hands on chair or thighs for a half-pike, breathe into the hamstrings.
- 1 minute: pelvic tilt and shoulder rolls, return to neutral posture.

Tip — standing posture and movement hygiene
When lifting, hinge at the hips first — bend the knees, keep the chest lifted, and bring objects close to your body. This distributes load through the legs rather than the low back.
For prolonged standing, shift weight gently between feet and micro-bend the knees now and then. During sleep, a pillow under the knees when supine or between the knees when side-lying keeps the lumbar spine more neutral.
These small everyday shifts — brief breaks, better lifting mechanics, sleep support — reinforce the benefits of a regular practice.
Troubleshooting Common Issues and Progressions
Progress is rarely linear. Understanding what’s normal and how to advance helps you stay steady without setbacks.
Why — increased mobility vs. temporary soreness
After beginning a new routine you may notice a pleasant increase in range or brief, mild soreness. This kind of transient muscle soreness usually feels like fatigue and resolves within 24–48 hours.
Distinguish that from pain that worsens with rest, causes numbness, or radiates — those are signals to pause and reassess. Keep a simple log of how movements feel over a week to identify patterns.
When in doubt, scale back intensity and length, and prioritize consistent gentle sessions over intermittent intensity.
How — sensible progression plan (4–8 weeks)
A gentle progression emphasizes consistency first. Start with short daily practices (10–20 minutes) for two weeks, focusing on mobility and breath. Increase hold time and the number of bridge reps in weeks 3–4 as tolerated.
Around weeks 5–8, you can add light resistance or longer holds — for example, hold bridge for longer or add standing single-leg balance work to challenge control. Increase slowly: one variable at a time and monitor pain scale trends.
If progress plateaus or pain increases, return to earlier, gentler options for a week. The aim is gradual resilience, not rapid gains.
- Weeks 1–2: daily 10–20 minute mobility and breath-focused practice.
- Weeks 3–4: add short strength-focused holds (bridge reps, 2–4 breath holds).
- Weeks 5–8: introduce light resistance or balance work, increase slowly.
Downloadable Daily Lower Back Yoga Checklist
A printable 2-page worksheet to guide your 15–25 minute sequence, note modifications, track pain on a simple 0–10 scale, and follow a gentle 4-week progression plan. Use it to stay consistent and notice small improvements.
Get the Checklist
Final Thoughts
Breath-first, movement-second — that simple order keeps your practice safe and effective. Prioritize short, consistent sessions, use props when needed, and listen to your body as you progress.
If symptoms change or worsen, seek professional guidance. When practiced with care, yoga for lower back pain can become a gentle daily ally — a way to restore ease and move through your day with more confidence.