Flexibility and Range of Motion: Chair Yoga for Limited Mobility
Flexibility and Range of Motion: Chair Yoga for Limited Mobility

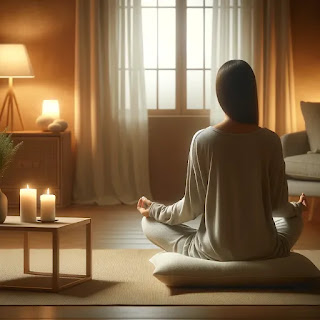
Flexibility and mobility are essential for performing everyday activities with ease and maintaining overall well-being. However, limited mobility, whether due to age, injury, or other health conditions, can make traditional forms of exercise challenging. Chair yoga offers a solution by allowing individuals to stretch and strengthen their bodies while remaining seated. This practice enhances flexibility, range of motion, and body awareness in a safe and supportive way.
In this article, we’ll explore specific chair yoga poses that are designed to improve flexibility and range of motion, detailing each pose’s benefits, adaptations, and techniques to help you visualize the experience.
The Importance of Flexibility and Mobility
Flexibility refers to the ability of your muscles and joints to move through their full range of motion. Over time, this can decrease due to inactivity, injury, or aging. When flexibility is reduced, it often leads to discomfort, restricted movement, and sometimes even pain.
Chair yoga is an excellent way to gently work on increasing flexibility without the need to be on the floor or perform weight-bearing exercises. Each pose can be modified to meet your needs, allowing you to gradually improve your range of motion while reducing the risk of injury.
Chair Yoga Poses for Flexibility and Range of Motion
Before we begin, ensure you have a sturdy chair without arms. Sit tall with both feet flat on the floor, keeping your spine elongated and core engaged. This posture alone sets the foundation for deeper stretches and safe movement.
Seated Mountain Pose (Tadasana)
How to Perform:
- Sit tall with your feet hip-width apart and hands resting on your thighs.
- Inhale deeply, lifting your arms above your head with palms facing each other. Reach up, lengthening your spine.
- On the exhale, lower your arms back down to your sides.
Adaptation:
If lifting your arms above your head is uncomfortable, you can place your hands on your hips and focus on lifting through your spine.
Mental Picture:
Imagine you are a tall mountain, rooted firmly into the earth through your feet and legs, while your upper body stretches toward the sky. Feel the length in your spine as you create space between each vertebra.
Why It Works:
This pose may seem simple, but it builds foundational alignment in your body. It engages the muscles of your back and stretches the shoulders, preparing you for deeper movements.
Seated Forward Fold (Uttanasana)
How to Perform:
- Sit at the edge of your chair with your feet planted firmly on the floor.
- Inhale and lengthen your spine.
- On the exhale, gently fold forward from the hips, allowing your hands to reach toward the floor or rest on your knees. Keep your spine as straight as possible.
- Hold for 3-5 breaths, then slowly roll back up to a seated position.
Adaptation:
If folding deeply is difficult, simply hinge slightly forward while keeping your hands on your thighs. Focus on maintaining a straight spine and only fold as far as is comfortable.
Mental Picture:
Picture your torso folding like a book, your spine staying straight and strong. Feel a release in your lower back and hamstrings, as though the tension is gently melting away.
Why It Works:
This forward fold stretches the lower back, hips, and hamstrings. It also gently compresses the abdomen, promoting relaxation and improving circulation to the spine and legs.
Seated Side Stretch (Parsva Urdhva Hastasana)
How to Perform:
- Sit tall with your feet flat on the floor.
- Inhale and reach your right arm up overhead, stretching through the right side of your body.
- Exhale and lean gently to the left, keeping your left hand on your chair for support.
- Hold for 3-4 breaths, then return to center and repeat on the other side.
Adaptation:
If reaching your arm overhead is too difficult, simply place your hand on your hip and focus on leaning to the side. You can also use a strap or towel to assist in the stretch by holding one end in each hand as you lift.
Mental Picture:
Imagine the side of your body stretching like a rubber band. Feel the lengthening from your hip to your fingertips, creating space between the ribs and opening the side body.
Why It Works:
This side stretch increases flexibility in the obliques and intercostal muscles (the muscles between your ribs), which are often neglected. It also helps open the chest and shoulders, improving posture and breathing.
Seated Pigeon Pose (Eka Pada Rajakapotasana)
How to Perform:
- Sit toward the edge of the chair with your feet flat on the floor.
- Lift your right ankle and place it across your left knee, creating a figure-four shape.
- Sit tall, then hinge forward slightly to feel a stretch in your right hip.
- Hold for 3-5 breaths before switching sides.
Adaptation:
If bringing your ankle onto your knee is too challenging, cross your ankle over your shin instead. You can also use a cushion under your ankle for support.
Mental Picture:
Visualize your hips opening like a flower. As you gently fold forward, imagine tension leaving your hip joint and muscles, creating a sense of release and relief.
Why It Works:
This pose stretches the hips and glutes, areas that tend to become tight with prolonged sitting or limited movement. It also promotes mobility in the hip joint, which is essential for everyday movements like walking or climbing stairs.
Seated Shoulder Rolls
How to Perform:
- Sit tall with your hands resting on your thighs.
- Inhale as you lift your shoulders toward your ears.
- Exhale and roll them back and down, creating a circular motion with your shoulders.
- Repeat 5 times, then switch directions, rolling forward.
Adaptation:
If full shoulder rolls are uncomfortable, you can make smaller circles or simply focus on lifting and lowering your shoulders.
Mental Picture:
Imagine your shoulders are gears, smoothly rotating in their sockets. As you roll them back and down, feel tension sliding off your shoulders like water running off your body.
Why It Works:
This simple movement increases flexibility in the shoulders and upper back, relieving tension that can accumulate from poor posture or stress. It also encourages better posture by promoting awareness of shoulder placement.
Seated Hamstring Stretch
How to Perform:
- Sit on the edge of the chair and extend your right leg in front of you, heel resting on the floor and toes pointing up.
- Inhale and sit tall, then exhale and hinge forward from the hips, reaching toward your toes.
- Hold for 3-4 breaths before switching legs.
Adaptation:
If reaching for your toes is too challenging, simply rest your hands on your thigh or knee and focus on lengthening your spine.
Mental Picture:
Picture your hamstrings like a coiled spring, gently uncoiling as you stretch. Feel the tension release from the back of your leg as you fold forward.
Why It Works:
This pose lengthens the hamstrings, which tend to get tight from sitting for long periods. Improved hamstring flexibility helps with walking, bending, and overall mobility.
Seated Spinal Twist (Ardha Matsyendrasana)
How to Perform:
- Sit tall with your feet flat on the floor.
- Inhale and lengthen your spine.
- Exhale as you twist to the right, placing your left hand on the outside of your right thigh and your right hand behind you on the seat of the chair.
- Hold for 3-4 breaths, then repeat on the other side.
Adaptation:
If twisting deeply is uncomfortable, you can keep your twist shallow, focusing on turning just your upper body. Use the back of the chair for support if needed.
Mental Picture:
Imagine your spine as a spiral staircase, gently twisting from the base to the top. Feel the rotation wring out tension and stiffness, like squeezing water out of a sponge.
Why It Works:
This pose increases flexibility in the spine and improves mobility in the upper back and shoulders. It also helps relieve tension and can aid in digestion by gently massaging the internal organs.
Adapting Your Practice to Your Needs
One of the greatest benefits of chair yoga is that it can be easily adapted to suit your individual needs. If you have difficulty with a particular pose, try smaller movements or use props like yoga blocks, straps, or cushions to provide additional support. Listen to your body and move within a range that feels comfortable for you.
Additionally, focusing on your breath can enhance your flexibility. By inhaling deeply and exhaling fully, you’ll find that your body naturally releases tension, allowing you to deepen your stretches over time.
Conclusion
Chair yoga offers a gentle yet effective way to improve flexibility and range of motion, even for those with limited mobility. By incorporating these poses into your daily routine, you can gradually increase your flexibility, relieve tension, and enhance your overall sense of well-being.
Whether you’re recovering from an injury, living with a chronic condition, or simply looking for a more accessible way to maintain your health, chair yoga provides a safe and adaptable option for enhancing your mobility. Take your time, listen to your body, and enjoy the process of reconnecting with your body through gentle movement.
Explore More on Adaptive Yoga
As you work through this series, I encourage you to explore some of my other articles on yoga, which dive deeper into adaptive practices and the benefits of chair and restorative yoga:
- A beginners guide to Adaptable Chair Yoga
- Yoga therapy for Mobility and Rehabilitation: how to use chair yoga
- The Essentials of Restorative Yoga: Poses, Props, and Practices
- Integrating Strength, Flexibility, and Balance: Adaptive Yoga Flow
- Balance and Coordination with Adaptive Yoga: Gentle Practices for All Ages
- Flexibility and Range of Motion: Chair Yoga for Limited Mobility
- Core Strength and Stability: Adaptive Chair Yoga for Beginners
- Breath Awareness and Mindful Movement
- 6-Week Adaptive Yoga Course: Build Strength, Flexibility, and Balance