A beginners guide to Adaptable Chair Yoga
Comprehensive Guide to Adaptive Chair Yoga for All Abilities
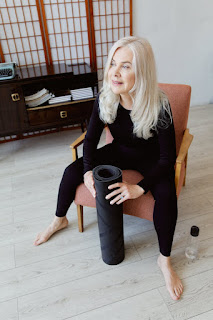
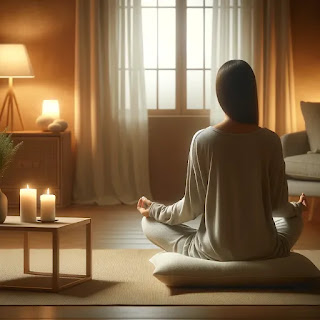
Imagine a form of adaptive yoga where you don’t need to get down on the floor or worry about balancing on one leg. Instead, you can experience the health benefits of yoga right from the comfort of a sturdy chair. This is chair yoga—a gentle and accessible practice that’s perfect for seniors or beginners looking to improve their flexibility, strength, and mental and emotional well-being without the need for a traditional yoga mat.
When I worked in a nursing home, I saw firsthand how powerful senior chair yoga can be. Many of the residents participated regularly in these gentle yoga sessions, and it became more than just an exercise routine—it was a way for them to maintain mobility, connect with others, and improve their overall mental and emotional health. Chair yoga classes brought smiles, laughter, and a shared sense of accomplishment to our community sessions.
Benefits of Chair Yoga
Physical Well-being: Adaptive yoga, particularly in the form of chair yoga, is especially beneficial for individuals who find traditional yoga poses challenging. This practice allows you to stretch and strengthen your muscles, improving flexibility and balance while seated. Whether you’re recovering from an injury, dealing with chronic pain, or seeking a gentle form of yoga to stay active, chair yoga can help you maintain and even enhance your mobility. It’s an ideal practice for seniors and others looking to preserve physical well-being through safe, effective movement.
Mental and Emotional Benefits: Beyond the physical benefits, chair yoga serves as a therapeutic escape from daily stress. The combination of mindful breathing and gentle, adaptive movements in seated yoga helps to calm the mind, reduce anxiety, and lift your mood. It’s a practice that nurtures not only your body but also your mental and emotional well-being, offering holistic health benefits. If your looking for more on stress relief and mindfulness check out, Mindfulness Meditation: A simple, fast way to reduce stress.
Social Connection: One of the most powerful aspects of chair yoga is its ability to foster social connections. In the nursing home, our senior chair yoga sessions were more than just exercise—they were social gatherings where residents bonded over shared experiences. Being part of a chair yoga group can combat loneliness, provide a sense of belonging, and encourage positive social interaction. Chair yoga classes not only promote physical health but also support emotional well-being through community and connection.
Where Can You Practice Chair Yoga?
One of the great things about chair yoga is its versatility. You can practice it anywhere:
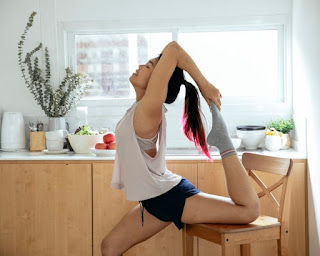
At Home: Create a calming environment at home, pull up a sturdy chair, and enjoy the benefits of seated yoga. This setup is perfect for integrating chair yoga into your daily routine, especially if you’re managing mobility issues or prefer a private practice.
In a Group Setting: Many community centers, senior facilities, and yoga studios offer chair yoga classes, providing an opportunity to connect with others while enjoying the benefits of a structured practice. These classes are often led by experienced yoga teachers who specialize in adaptive yoga for seniors and those with physical limitations.
At Work: Chair yoga is an excellent way to break up your workday, helping you to relieve stress, reduce anxiety, and refocus. Practicing chair yoga at your desk can improve your posture, reduce tension, and boost your productivity, all while maintaining a connection to your physical and mental well-being.
Chair yoga isn’t just a workout; it’s a holistic practice that enhances your physical health, mental clarity, and emotional well-being. It’s about finding strength, flexibility, and inner peace—all while sitting down. Whether you’re new to yoga or adapting your practice to your current abilities, chair yoga is a wonderful way to stay active, improve mobility, and maintain social connection.

The Importance of the Mind-Body Connection in Chair Yoga
Chair yoga isn’t just about moving your body; it’s about connecting with yourself on a deeper level. This is the most challenging aspect of chair yoga for many practitioners, connecting movements with breath and opening your body awareness. Transformation is all about the mind-body connection, a core element of yoga that enhances both mental and physical well-being.
Why Mind-Body Connection Matters in Yoga
Enhancing Awareness: The mind-body connection is the practice of being fully aware of your body and movements, tuning into how you feel as you flow through each pose. In chair yoga, this awareness is key. It allows you to move with intention, listening to your body’s cues, and adjusting as needed. Whether you’re stretching your arms or taking a deep breath, being mindful of these actions helps you perform them more effectively and safely.
Reducing Stress: One of the primary benefits of chair yoga is its ability to reduce stress. By focusing on your breath and the sensations in your body, you can shift your attention away from worries and into the present moment. This shift calms the nervous system, helping to lower stress levels and create a sense of inner peace. During our chair yoga sessions, I often saw residents visibly relax, their faces softening as they let go of the tension they had been carrying.
Improving Mental Clarity: A strong mind-body connection also boosts mental clarity. Chair yoga encourages you to concentrate on the here and now, which can clear away mental clutter and improve focus. This is particularly beneficial for older adults, as it can enhance cognitive function and provide a mental workout that complements the physical one.
How Chair Yoga Strengthens the Mind-Body Connection
Breathwork and Movement: In chair yoga, breathwork is integrated with movement, creating a rhythm that helps you stay present. Each inhale and exhale is matched with a stretch, a twist, or a gentle bend, turning simple movements into a meditative practice. For example, as you lift your arms overhead, you might inhale deeply, expanding your chest and filling your lungs with air. As you lower your arms, you exhale slowly, releasing tension and grounding yourself.
Mindful Movements: Every movement in chair yoga is an opportunity to practice mindfulness. Whether it’s a seated twist or a forward bend, you’re encouraged to move slowly, paying attention to how your body responds. This mindfulness not only enhances the physical benefits of the pose but also deepens your connection to your body, fostering a greater sense of self-awareness and self-compassion.
Emotional Well-Being: The mind-body connection in chair yoga extends to emotional well-being. By being present in your practice, you can better understand and manage your emotions. Chair yoga provides a safe space to explore how you feel, both physically and emotionally, and to release any pent-up stress or anxiety. This emotional release can lead to a more balanced and positive outlook on life.
Practical Tips for Strengthening Your Mind-Body Connection
Start with Breath Awareness: Begin each chair yoga session by focusing on your breath. Notice the sensation of the air entering and leaving your body, and try to synchronize your breathing with your movements. This simple practice can help you center your mind and prepare your body for the poses ahead.
Move Slowly and Intentionally: Take your time with each movement, paying attention to how your body feels. If a pose feels challenging, breathe through it and adjust as needed. Remember, chair yoga is about working with your body, not against it.
End with Reflection: After your chair yoga session, take a moment to reflect on how you feel. Notice any changes in your mood, energy levels, or physical comfort. This reflection can help you deepen your mind-body connection and carry the benefits of your practice into the rest of your day.
In chair yoga, the mind-body connection is at the heart of the practice. It’s what turns a series of movements into a transformative experience, helping you to not only build physical strength and flexibility but also to cultivate a sense of inner peace and mental clarity. By focusing on this connection, you can unlock the full potential of your chair yoga practice, bringing balance and harmony to both your body and mind.
Preparing for Chair Yoga
Before you begin your chair yoga journey, it’s essential to set the stage for a comfortable and effective practice. Whether you’re trying chair yoga for the first time or making it a regular part of your routine, taking a few moments to prepare can make a big difference. From selecting the right chair to creating a calming environment, these steps will help you get the most out of your practice.
Choosing the Right Chair
Stability is Key: The chair you use is the foundation of your practice, so it’s important to choose one that is stable and supportive. Look for a chair with a flat seat, sturdy legs, and no wheels. The last thing you want is to worry about your chair moving or tipping while you’re trying to focus on your poses.
Height Matters: Your chair should be at a height where your feet can rest flat on the floor, with your knees bent at a 90-degree angle. This alignment is crucial for maintaining proper posture during your practice and ensuring that you can perform the poses comfortably.
Back Support: A chair with a supportive backrest is ideal, especially if you’re planning to include seated poses that involve leaning back. However, you’ll also want to make sure the chair’s back isn’t too restrictive, allowing you to move freely during your practice.
Setting Up Your Space
Create a Calm Environment: The space where you practice chair yoga should be calm and clutter-free. If possible, find a quiet room where you can focus without distractions. You might want to play some soft music or light a candle to enhance the atmosphere and help you relax.
Adequate Lighting: Good lighting is important, but it should be soft and gentle. Natural light is ideal, but if that’s not possible, opt for warm, ambient lighting that creates a soothing environment.
Room to Move: Make sure there’s enough space around your chair for you to move your arms and legs freely. You don’t need a lot of room, but a clear area will allow you to perform each pose with ease.
Yoga Props: While not necessary, having a few yoga props on hand can enhance your practice. A yoga strap or belt can help you deepen stretches, while a block or cushion can provide extra support in certain poses. If you don’t have these items, you can use everyday objects like a towel or a sturdy book as substitutes.
What to Wear
Comfort is Key: Wear comfortable, loose-fitting clothing that allows you to move freely. Avoid anything too tight or restrictive, especially around the waist and legs. The goal is to feel comfortable and at ease in whatever poses you’re doing.
Footwear: Chair yoga can be practiced barefoot, in socks, or even in supportive shoes—whatever feels most comfortable and stable for you. If you choose to wear shoes, make sure they are flexible and allow you to feel connected to the ground.
Accessories: You might want to have a light blanket or shawl nearby, especially if you’re practicing in a cooler room or plan to do a relaxation pose at the end of your session. A water bottle within reach is also a good idea, so you can stay hydrated during your practice.
Mindset and Intentions
Set an Intention: Before you start your chair yoga session, take a moment to set an intention. This could be something as simple as focusing on your breath, being kind to yourself, or just enjoying the experience. Setting an intention helps to ground your practice and gives you something to return to if your mind starts to wander.
Focus on Your Breath: Begin by sitting comfortably in your chair and taking a few deep breaths. This simple act of focusing on your breath helps to center your mind and prepare your body for the poses ahead. Remember, chair yoga is as much about your mental state as it is about your physical movements.
Listen to Your Body: As you move through your chair yoga practice, pay close attention to how your body feels. If something doesn’t feel right, don’t hesitate to modify the pose or skip it altogether. Chair yoga is about adapting the practice to suit your body’s needs, so always prioritize comfort and safety.
By taking the time to prepare, you create a solid foundation for a successful chair yoga practice. With the right chair, a calming environment, and a focused mindset, you’ll be ready to fully enjoy the benefits of chair yoga—whether it’s your first session or part of your regular routine.

Warm-Up Poses
Before diving into more dynamic chair yoga poses, it’s important to gently warm up the body. These warm-up exercises are designed to increase blood flow, improve flexibility, and prepare both the body and mind for the practice ahead. They’re simple, yet effective, and can be done by anyone, regardless of their physical condition.
Breath Awareness
Seated Deep Breathing Exercises: Begin your chair yoga session by grounding yourself in your breath. Sit comfortably on your chair with your feet flat on the floor and your hands resting gently on your lap. Close your eyes if it feels comfortable, and take a deep breath in through your nose, allowing your abdomen to expand as you fill your lungs with air. Slowly exhale through your mouth, feeling your body relax with each breath. Repeat this deep breathing for several rounds, focusing on the sensation of the breath entering and leaving your body. This simple exercise helps to calm the mind and bring your attention into the present moment.
Simple Pranayama Techniques:
- Ujjayi Breathing: Often called the “ocean breath,” Ujjayi involves slightly constricting the back of your throat as you inhale and exhale through your nose. This creates a soft, whispering sound, like the waves of the ocean. Ujjayi breath helps to regulate your breath and maintain a steady rhythm during your practice, fostering a sense of calm and focus.
- Anulom Vilom (Alternate Nostril Breathing): This balancing breath technique helps to calm the nervous system and balance the two hemispheres of the brain. To practice, close your right nostril with your right thumb and inhale deeply through your left nostril. Close your left nostril with your ring finger, then open your right nostril and exhale through it. Inhale again through the right nostril, close it, and exhale through the left nostril. Continue this alternating pattern for several breaths, maintaining a slow, steady rhythm.
Seated Neck Stretches
Gentle Side-to-Side Neck Stretches: Sitting tall in your chair, gently drop your right ear towards your right shoulder, feeling the stretch along the left side of your neck. Hold for a few breaths, then slowly bring your head back to center. Repeat on the opposite side. These gentle stretches help to release tension in the neck and shoulders, which is especially beneficial if you spend a lot of time sitting at a desk or looking at a screen.
Neck Rolls: From a seated position, slowly drop your chin towards your chest, feeling the stretch at the back of your neck. Begin to gently roll your head to the right, bringing your ear towards your shoulder, then continue the roll so your head moves back, stretching the front of your neck, and finally rolling to the left shoulder. Complete a few rolls in each direction, moving slowly and mindfully. Neck rolls help to improve flexibility and relieve stiffness in the neck and upper shoulders.
Shoulder Rolls
Forward and Backward Shoulder Rolls: Sit up straight with your hands resting on your thighs or at your sides. Begin by lifting your shoulders up towards your ears, then roll them back and down, making a circular motion. After a few backward rolls, reverse the direction, rolling your shoulders forward. Shoulder rolls are excellent for releasing tension and improving mobility in the shoulders, which often hold a lot of stress.
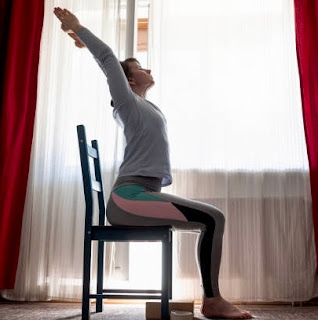
Stretching Arms Overhead and Behind the Back: With your arms hanging loosely at your sides, take a deep breath in and slowly lift your arms overhead, reaching towards the sky. Stretch through your fingertips and lengthen your spine, then exhale as you lower your arms back down. Next, clasp your hands behind your back and gently stretch your arms back and down, opening up your chest and shoulders. This stretch helps to counteract the forward-hunching posture many of us develop from sitting for long periods.
Seated Cat-Cow Pose
Explanation and Benefits: Seated Cat-Cow is a gentle, flowing movement that helps to stretch and strengthen the spine while improving flexibility in the back and neck. It’s a great way to warm up the entire spine, making it more pliable for the poses to come. This pose also helps to synchronize your breath with movement, which is essential for creating a mindful yoga practice.
How to Synchronize Breath with Movement:
- Cat Pose: Sit tall with your hands resting on your knees. As you exhale, round your spine, tucking your chin towards your chest and drawing your belly button in towards your spine. Feel the stretch along the back of your neck and between your shoulder blades.
- Cow Pose: As you inhale, arch your back, lifting your chest and head, and drawing your shoulders back. Allow your belly to move forward slightly, creating a gentle curve in your lower back.
- Flow Between the Two: Continue to flow between Cat and Cow with each breath—exhaling as you round into Cat, and inhaling as you open into Cow. This movement not only warms up your spine but also helps to improve circulation and relieve tension in the back and neck.
These warm-up exercises are simple yet effective ways to prepare your body for the rest of your chair yoga practice. They help to awaken the muscles, improve flexibility, and bring your focus into the present moment, ensuring that you start your practice feeling centered and ready.
Seated Yoga Poses
This section introduces a variety of seated yoga poses that can be performed right from the comfort of your chair. These poses are designed to improve flexibility, strength, and balance while being accessible to individuals with varying levels of mobility. Each pose includes adaptations to accommodate different physical abilities, ensuring that everyone can participate and benefit.
Seated Forward Bend
Adaptation of Uttanasana (Standing Forward Bend): Seated Forward Bend is a gentle adaptation of the traditional Standing Forward Bend. Begin by sitting towards the edge of your chair with your feet flat on the floor, hip-width apart. Inhale deeply, lengthening your spine, and as you exhale, hinge at your hips and slowly fold forward. Allow your hands to rest on your thighs, shins, or the floor, depending on your flexibility. Let your head and neck relax completely, feeling the stretch along your back and the back of your legs.
Modifications for Lower Back Support: If you have lower back issues, place a cushion or folded blanket on your thighs to rest your torso as you fold forward. This will provide extra support and reduce strain on your lower back. Alternatively, you can keep your hands on your thighs or knees, maintaining a smaller range of motion while still benefiting from the stretch.
Seated Spinal Twist
Explanation and Benefits: The Seated Spinal Twist is a wonderful pose for improving spinal mobility and digestion. Twists help to massage the internal organs, promoting better digestion and detoxification. They also enhance flexibility in the spine and can relieve tension in the back and shoulders.
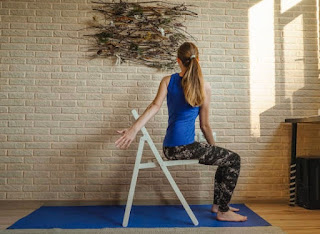
How to Perform the Pose: Sit tall with your feet firmly planted on the ground. Inhale deeply to lengthen your spine, and as you exhale, twist your torso to the right, placing your left hand on the outside of your right thigh and your right hand on the back of the chair. Keep your spine straight and your shoulders relaxed. Hold the twist for a few breaths, feeling the stretch along your spine. Slowly return to center on an inhale and repeat on the other side.
Variations for Limited Mobility: For those with limited mobility, the twist can be more subtle. Simply place your hand on the opposite thigh and gently turn your head and shoulders in the direction of the twist, keeping the movement small and controlled. This variation still provides the benefits of the twist without overexerting the body.
Seated Warrior I & II
Adaptations of Traditional Standing Warrior Poses: The Warrior poses are powerful postures that build strength and stability. In their seated adaptations, these poses are just as effective while being more accessible.
- Seated Warrior I: Sit tall with your feet grounded. Extend your right leg forward, keeping it bent at a 90-degree angle, and slide your left leg back as far as comfortable. Inhale as you lift your arms overhead, palms facing each other, and gaze up slightly. This pose strengthens the legs and arms while opening the chest and hips.
- Seated Warrior II: From Seated Warrior I, open your hips by turning your torso to face the side, extending your arms parallel to the floor with your palms down. Keep your right knee bent and your left leg extended back. Gaze over your right fingertips, feeling the strength in your legs and arms. This pose promotes balance, focus, and stability.
Modifications for Individuals with Limited Lower Body Strength: If extending the legs causes discomfort, keep both feet flat on the ground and focus on the upper body movements. You can also place a cushion under your hips for added support. The emphasis should be on maintaining an upright posture and engaging the core.
Seated Mountain Pose
Importance of Posture and Alignment: Seated Mountain Pose is a foundational posture that emphasizes the importance of proper alignment and posture. Sit up straight with your feet flat on the floor, knees at a 90-degree angle, and hands resting on your thighs. Imagine a string pulling the crown of your head towards the ceiling, lengthening your spine. This pose helps to improve posture, engage the core, and create a sense of grounding.
Awareness of Core Engagement and Grounding: In Seated Mountain Pose, focus on engaging your core by drawing your belly button towards your spine. This engagement supports your lower back and helps to stabilize your posture. Feel your feet pressing into the ground, creating a strong connection with the earth. This grounding sensation can help you feel centered and balanced.
Seated Eagle Pose
Adaptations for Individuals with Shoulder or Knee Issues: Seated Eagle Pose is an excellent way to stretch the shoulders, upper back, and hips. Start by sitting tall with your feet flat on the ground. Cross your right thigh over your left thigh, and if possible, tuck your right foot behind your left calf. If this is too challenging, simply cross your legs at the thighs. Next, extend your arms in front of you, crossing your right arm over your left at the elbows, and bring your palms together. Lift your elbows slightly and draw your hands away from your face, feeling the stretch in your shoulders.
Variations for Different Levels of Flexibility: If bringing the palms together is difficult, you can place the back of your hands together instead. Another option is to keep the arms crossed at the elbows and rest your hands on your shoulders, focusing on the stretch in your upper back and shoulders. For the legs, keep both feet grounded if crossing them is uncomfortable.
Seated Pigeon Pose
Hip Opener Adapted for Chair Yoga: Seated Pigeon Pose is a great hip opener, especially for those who sit for long periods. Begin by sitting tall with your feet flat on the floor. Lift your right foot and place your right ankle on your left thigh, just above the knee. Flex your right foot to protect your knee. As you inhale, lengthen your spine, and as you exhale, gently hinge forward at the hips, bringing your chest closer to your leg. You should feel a deep stretch in your right hip and glute.
Modifications for Varying Levels of Hip Mobility: If placing your ankle on your thigh is too intense, you can place your right foot on the edge of your chair instead. Another option is to keep both feet on the ground and simply cross your right ankle over your left ankle, then gently lean forward. These modifications allow you to adjust the intensity of the stretch based on your hip mobility.
Adaptations for Lying Down
In addition to seated poses, chair yoga can also include gentle, lying down adaptations. These poses offer deep relaxation and effective stretches, making them a perfect addition to your chair yoga practice. Whether you’re transitioning from your chair to a mat or simply reclining on a comfortable surface, these lying-down adaptations help to release tension, improve flexibility, and promote a deep sense of calm.
Lying Down Breath Awareness
Focus on Diaphragmatic Breathing: Lying down is an ideal position to practice diaphragmatic breathing, also known as belly breathing. Begin by lying on your back with your knees bent and feet flat on the floor, or legs extended if that’s more comfortable. Place one hand on your abdomen and the other on your chest. Take a deep breath in through your nose, allowing your abdomen to rise as you fill your lungs with air. Exhale slowly through your mouth, feeling your abdomen fall. This type of breathing engages the diaphragm more fully, helping to increase lung capacity and promote relaxation.
Guided Body Scan Relaxation: After practicing diaphragmatic breathing, you can move into a guided body scan to further relax your body and mind. Starting from your toes, slowly bring your awareness to each part of your body, consciously relaxing the muscles as you go. Move up through your legs, torso, arms, neck, and head, letting go of any tension you might be holding. This practice helps to calm the nervous system and prepare your body for deeper relaxation in the poses that follow.
Reclining Bound Angle Pose (Supta Baddha Konasana)
Benefits and Modifications for Hip and Groin Opening: Reclining Bound Angle Pose is a gentle hip opener that also stretches the groin and inner thighs. Begin by lying on your back and bringing the soles of your feet together, allowing your knees to fall open to the sides. Place your hands on your abdomen or by your sides. If this stretch feels too intense, place cushions or folded blankets under your knees for support. This modification helps reduce strain on the hips and groin while still providing the benefits of the pose.
Use of Props for Support: To enhance comfort in Reclining Bound Angle Pose, you can also place a bolster or pillow under your back and head to create a slight incline. This support allows for a more restorative version of the pose, encouraging deeper relaxation while gently opening the hips.
Lying Down Spinal Twist
Gentle Twist for Lower Back Relief: Lying Down Spinal Twist is a restorative pose that gently stretches the lower back and promotes spinal mobility. Begin by lying on your back with your knees bent and feet flat on the floor. Extend your arms out to the sides, forming a T-shape with your body. On an exhale, drop both knees to one side, allowing your head to turn in the opposite direction. Hold the twist for several breaths, feeling the stretch along your spine and lower back. Slowly bring your knees back to center on an inhale, then repeat on the other side.
Variations with and Without Bent Knees: For a gentler twist, you can keep your knees bent at a 90-degree angle, stacking them on top of each other as you twist. If you prefer a deeper stretch, extend the top leg straight out, while keeping the bottom leg bent. Alternatively, if the twist feels too intense, keep both knees bent and stacked but place a pillow or blanket under them for added support.
Lying Down Leg Stretches
Use of a Strap for Hamstring Stretches: Lying Down Leg Stretches are an excellent way to lengthen the hamstrings and improve flexibility. Begin by lying on your back with your legs extended. Bend your right knee and bring it towards your chest, looping a yoga strap or belt around the arch of your foot. Extend your right leg towards the ceiling, holding both ends of the strap in your hands. Keep your left leg extended on the floor or bent at the knee for more comfort. Gently pull the strap to deepen the stretch, ensuring your back remains flat on the ground.
Modifications for Those with Tight Hamstrings: If your hamstrings are tight, keep a slight bend in your right knee as you extend the leg. You can also shorten the range of motion by bringing the leg only partway up, gradually increasing the stretch as your flexibility improves. Remember to switch sides and repeat the stretch with your left leg.
Reclined Savasana
Importance of Rest and Relaxation in Yoga: Savasana, or Corpse Pose, is traditionally the final pose in a yoga practice, allowing the body and mind to absorb the benefits of the session. In Reclined Savasana, lie flat on your back with your legs extended and arms resting by your sides, palms facing up. Allow your feet to fall open naturally and close your eyes. This pose is all about complete relaxation, letting go of any remaining tension and focusing on your breath.
Guided Meditation or Breathing Exercise to Conclude the Practice: To enhance your Savasana, you can incorporate a guided meditation or a simple breathing exercise. Focus on your breath, noticing the rise and fall of your abdomen with each inhale and exhale. Alternatively, listen to a guided relaxation script that helps you release any lingering tension and bring your practice to a peaceful close. Savasana is a time to simply be, without any effort or intention, allowing your body to rest and rejuvenate.
While chair yoga is often associated with gentle stretching and relaxation, it’s also a powerful tool for building strength. These strengthening poses are designed to target key muscle groups, improving overall stability, and enhancing physical endurance—all while being accessible from a seated position. Whether you’re looking to maintain muscle mass, recover from an injury, or simply add a bit of challenge to your routine, these chair yoga poses will help you build strength in a safe and supportive way.

Seated Leg Lifts
Strengthening the Lower Body: Seated Leg Lifts are a simple yet effective way to strengthen the muscles in your thighs, hips, and lower abdomen. Begin by sitting tall with your feet flat on the floor and hands resting on your thighs or the sides of the chair. Inhale deeply, and as you exhale, lift your right leg off the floor, extending it straight out in front of you. Hold for a few seconds, then lower it back down on an inhale. Repeat on the left side. This movement engages your quadriceps and hip flexors, helping to build strength and improve mobility in the lower body.
Variations for Different Fitness Levels:
- Beginners: Start with smaller leg lifts, keeping your foot just a few inches off the ground.
- Intermediate: Lift the leg higher, bringing it parallel to the floor, and hold for a longer duration.
- Advanced: Add resistance by using ankle weights or placing a small cushion or yoga block between your thighs, squeezing it as you lift your legs.
Seated Knee Extensions
Strengthening the Quadriceps: Knee Extensions focus on strengthening the quadriceps, the large muscles at the front of your thighs. Sit towards the edge of your chair with your feet flat on the floor. Inhale as you extend your right leg straight out in front of you, straightening the knee. Flex your foot so that your toes point towards the ceiling. Hold for a few seconds, feeling the muscles in your thigh engage, then slowly lower the leg back down on an exhale. Repeat on the left side. This exercise is particularly beneficial for those who need to strengthen their knees and improve joint stability.
Modifications for Those with Knee Issues: If you experience discomfort in your knees, you can modify this exercise by only partially extending the leg, keeping a slight bend in the knee. Alternatively, you can focus on the upper body by placing your hands on your thighs and gently pressing down as you lift your leg, engaging your arms and shoulders.
Seated Arm Strengthening
Using Light Weights or Resistance Bands: Strengthening the arms can be easily incorporated into chair yoga with the use of light weights or resistance bands. Sit up straight with your feet flat on the floor. Hold a light weight (or a resistance band) in each hand, with your arms resting by your sides.
- Bicep Curls: Inhale as you curl your arms upwards, bringing the weights towards your shoulders. Exhale as you slowly lower them back down. This exercise targets the biceps, helping to build strength in the upper arms.
- Tricep Extensions: Extend your arms overhead, holding the weights or resistance band. Inhale as you bend your elbows, lowering the weights behind your head. Exhale as you straighten your arms, engaging the triceps at the back of your arms.
- Lateral Raises: With your arms by your sides, inhale as you lift them out to the sides to shoulder height, creating a T-shape with your body. Exhale as you slowly lower them back down. This exercise strengthens the shoulders and upper arms.
Modifications for Different Fitness Levels:
- Beginners: Use very light weights or no weights at all, focusing on the movement and form.
- Intermediate: Increase the weight or resistance slightly, and aim for more repetitions.
- Advanced: Add more weight or use a stronger resistance band, or perform the exercises in a slower, more controlled manner to increase the challenge.
Core Engagement Exercises
Seated or Lying Down Poses for Core Strengthening: Building a strong core is essential for maintaining good posture, balance, and overall strength. These core exercises can be done seated or lying down, depending on your comfort and ability.
- Seated Forward Bend with Core Engagement: Sit tall with your feet flat on the floor. Inhale deeply, and as you exhale, engage your core muscles by drawing your belly button towards your spine. Slowly hinge forward at your hips, reaching your hands towards your feet. Hold for a few breaths, focusing on maintaining the core engagement, then inhale as you return to an upright position. This movement strengthens the core while gently stretching the back and hamstrings.
- Seated Knee-to-Chest: Sit towards the edge of your chair with your feet flat on the floor. Inhale as you lift your right knee towards your chest, engaging your core to stabilize your body. Wrap your hands around your knee for support, if needed. Hold for a few seconds, then exhale as you lower your foot back down. Repeat on the left side. This exercise targets the lower abdominal muscles and improves core stability.
- Lying Down Leg Lifts: If lying down is an option, you can perform leg lifts to target the lower abs. Lie flat on your back with your legs extended. Inhale as you lift both legs towards the ceiling, keeping them straight. Exhale as you slowly lower them back down, stopping just before they touch the ground. This exercise is more advanced and requires strong core engagement to protect the lower back.
Modifications for Varying Levels of Core Strength:
- Beginners: Perform smaller movements, keeping one foot on the floor for stability during the Seated Knee-to-Chest exercise.
- Intermediate: Increase the range of motion, lifting the knees higher and holding the position longer.
- Advanced: Combine these exercises into a flowing sequence, moving from one to the next with minimal rest to keep the core fully engaged.
These chair yoga poses for strengthening are designed to build muscle, improve balance, and enhance overall physical endurance. They are adaptable for all fitness levels, allowing you to progress at your own pace while gaining strength in a supportive, seated environment. Whether you’re new to exercise or looking to supplement your regular routine, these poses provide a safe and effective way to strengthen your body with the support of a chair.

Yoga for Flexibility and Mobility
Flexibility and mobility are key components of overall physical health, especially as we age or if we spend long periods sitting. Chair yoga offers a gentle way to improve flexibility and enhance mobility without the need for getting down on the floor. These poses target areas of the body that often become tight and stiff, helping to increase your range of motion and reduce discomfort.
Seated Hamstring Stretch
Adaptation of Traditional Hamstring Stretches: The hamstrings, located at the back of your thighs, can become tight from prolonged sitting. The Seated Hamstring Stretch is a simple yet effective way to lengthen these muscles. Sit towards the edge of your chair with your feet flat on the floor. Extend your right leg straight out in front of you, resting your heel on the floor with your toes pointing up. Inhale as you lengthen your spine, and as you exhale, gently hinge forward at the hips, reaching towards your toes. Keep your back straight and avoid rounding your shoulders. Hold the stretch for several breaths, feeling the lengthening in the back of your thigh. Return to the starting position on an inhale, then repeat on the left side.
Use of a Strap or Towel for Assistance: If reaching your toes is challenging, use a yoga strap or towel looped around the ball of your foot. Hold the ends of the strap in your hands, and gently pull yourself forward, using the strap to deepen the stretch. This modification allows you to control the intensity of the stretch, making it accessible for those with tight hamstrings or lower back issues. If you are struggling and need some resources check out the International Association of Yoga Therapists.
Seated Side Bend
Improving Flexibility in the Side Body: The Seated Side Bend is excellent for stretching the muscles along the sides of your torso, improving flexibility in the spine, and relieving tension in the lower back and shoulders. Sit up straight with your feet flat on the floor. Inhale as you lift your right arm overhead, and as you exhale, gently lean to the left, reaching your right hand towards the ceiling while your left hand rests on the chair for support. Keep both hips grounded and focus on creating length through the right side of your body. Hold the stretch for a few breaths, then inhale as you return to center. Repeat on the opposite side.
Variations for Different Levels of Mobility:
- Beginners: Keep the side bend small, focusing on lengthening rather than how far you can lean.
- Intermediate: Deepen the stretch by reaching your right hand further overhead, keeping your arm close to your ear.
- Advanced: If you’re comfortable with more movement, gently twist your torso towards the ceiling as you bend, opening the chest to add an additional stretch to the side body.
Seated Chest Opener
Stretching the Chest and Shoulders: Poor posture, especially from sitting, can lead to tightness in the chest and shoulders. The Seated Chest Opener helps to counteract this by stretching these areas, improving posture and relieving upper body tension. Sit tall with your feet flat on the floor. Clasp your hands behind your back, or if that’s uncomfortable, hold onto the sides of your chair. Inhale as you draw your shoulders back and down, opening your chest. If it feels good, you can gently lift your hands away from your back to deepen the stretch. Hold this position for several breaths, focusing on expanding your chest with each inhale. Release the stretch on an exhale, returning to a neutral sitting position.
Modifications for Limited Shoulder Mobility: If clasping your hands behind your back is difficult, use a strap or towel to bridge the gap between your hands. This allows you to perform the chest opener without straining your shoulders. Alternatively, you can keep your hands on the sides of the chair and focus on gently drawing your shoulders back, still benefiting from the chest-opening action.
These chair yoga poses are designed to improve flexibility and enhance mobility, helping you to move more freely and with less discomfort. By incorporating these stretches into your regular routine, you can increase your range of motion, reduce tension in commonly tight areas, and support better posture and overall well-being. Whether you’re looking to counteract the effects of prolonged sitting or simply want to maintain your flexibility, these poses offer a gentle and effective way to keep your body moving smoothly.
Yoga for Relaxation and Stress Relief
Chair yoga is not only about physical exercise; it’s also a powerful tool for calming the mind and reducing stress. This section focuses on poses and techniques designed to help you unwind, release tension, and find inner peace. Whether you’re dealing with the pressures of daily life or simply need a moment of calm, these chair yoga practices will guide you to a state of deep relaxation.
Seated Guided Meditation
Simple Techniques for Calming the Mind: Meditation is a cornerstone of yoga practice and a highly effective way to reduce stress and anxiety. Begin by sitting comfortably in your chair with your feet flat on the floor and your hands resting on your lap. Close your eyes and take a few deep breaths, allowing your body to relax with each exhale. Focus on your breath, noticing the sensation of the air entering and leaving your nostrils. If your mind begins to wander, gently bring your attention back to your breath. You can also silently repeat a calming phrase or mantra, such as “peace” or “relax,” with each breath. This simple meditation can be done for just a few minutes or longer, depending on your needs, and is a powerful way to calm the mind and find a moment of peace during your day.
Seated Forward Fold with Relaxation
Using Forward Folds to Release Tension: The Seated Forward Fold is a gentle and effective pose for releasing tension in the back, neck, and shoulders. Sit towards the edge of your chair with your feet flat on the floor, hip-width apart. Inhale deeply to lengthen your spine, and as you exhale, slowly fold forward, allowing your arms to hang towards the floor. Let your head and neck relax completely, feeling the stretch along your back. If it feels comfortable, you can rest your hands on your feet, the floor, or let them dangle freely. Hold this position for several breaths, letting go of any stress or tension with each exhale. Slowly return to an upright position on an inhale, feeling refreshed and relaxed.
Modifications with Props for Deeper Relaxation: For a more restorative version of the Seated Forward Fold, place a cushion or pillow on your lap and rest your head and arms on it as you fold forward. This support allows you to relax more deeply into the pose, turning it into a moment of restful surrender. You can also use a bolster or folded blanket on the floor to rest your hands and forearms, creating a more supported and gentle stretch.
Lying Down Progressive Muscle Relaxation
Systematic Tensing and Releasing of Muscle Groups: Progressive Muscle Relaxation (PMR) is a technique that involves tensing and then slowly releasing different muscle groups in the body, promoting deep relaxation and stress relief. If you’re able to lie down, begin by getting comfortable on your back, either on a yoga mat or your bed. Close your eyes and take a few deep breaths. Start with your feet, tensing the muscles by curling your toes and holding for a few seconds, then release completely, noticing the contrast between tension and relaxation. Move up through your body—tense and release your calves, thighs, abdomen, chest, arms, hands, shoulders, neck, and face. As you release each muscle group, focus on the feeling of relaxation spreading through your body. This practice can help to reduce physical tension and promote a state of deep calm.
Guided Relaxation for Complete Body Release: For an even deeper relaxation experience, you can follow a guided relaxation script or recording that leads you through the process of tensing and releasing each muscle group. This can be particularly helpful if you’re new to PMR or find it difficult to relax on your own. The guided approach helps you to stay focused and ensures that you move through the relaxation systematically, leaving no part of your body untouched by the calming effects.
These relaxation and stress relief practices are a gentle yet powerful way to unwind and find peace, whether you’re sitting in a chair or lying down. By incorporating these techniques into your routine, you can manage stress more effectively, improve your mental clarity, and enhance your overall well-being. Chair yoga’s accessibility makes it an ideal practice for anyone looking to reduce stress and promote relaxation, no matter where they are or how much time they have.

Building a Regular Chair Yoga Practice
Establishing a regular chair yoga practice is key to reaping the long-term benefits of increased flexibility, strength, relaxation, and overall well-being. Whether you’re just beginning your yoga journey or looking to maintain consistency in your practice, this section provides guidance on how to create a personalized, sustainable routine that fits into your daily life.
Creating a Personalized Practice
Tailoring Your Practice to Your Needs: One of the greatest advantages of chair yoga is its adaptability. You can tailor your practice to meet your individual needs, whether you’re focusing on building strength, improving flexibility, or reducing stress. Start by identifying your goals—do you want to increase your range of motion, manage pain, or find a moment of peace each day? Based on your goals, select the poses and techniques that resonate most with you. For example, if you’re dealing with tight hips, incorporate more hip-opening poses like Seated Pigeon Pose. If stress relief is your priority, focus on breathing exercises and relaxation techniques.
Incorporating Variety: To keep your practice engaging and effective, mix up your routine with different poses and sequences. Rotate between strength-building exercises, flexibility-enhancing stretches, and relaxation practices to ensure a balanced approach. Variety not only keeps your practice interesting but also helps to work different muscle groups and address various aspects of your well-being.
Combining Chair Yoga with Other Forms of Yoga
Integrating Chair Yoga into a Broader Yoga Practice: Chair yoga is a versatile practice that can easily be combined with other forms of yoga. For those who already practice traditional yoga, chair yoga can serve as a gentle complement, particularly on days when you need a less intense session. You can start your practice with chair yoga to warm up your body before moving on to standing poses, or use it as a cool-down at the end of a more vigorous practice.
Adapting Traditional Poses: Many traditional yoga poses can be adapted for a chair, allowing you to continue practicing your favorite asanas even if you’re dealing with physical limitations. For example, if you’re accustomed to practicing standing Warrior poses, try the seated variations to maintain the benefits while reducing the strain on your legs and joints.
Developing a Routine: If you’re new to chair yoga or have a busy schedule, start small with just 5-10 minutes a day. As you become more comfortable and confident in your practice, gradually increase the duration and complexity of your sessions. Over time, you’ll notice the cumulative health benefits of regular practice, such as improved flexibility, reduced stress, enhanced mental and emotional health, and overall well-being. This gradual approach is also ideal for those working with rehabilitative therapists or physical therapists to ensure a safe and effective yoga class experience.
Establishing a Consistent Practice Schedule: Consistency is crucial when it comes to building a successful chair yoga practice, particularly for individuals with chronic pain or those recovering from injuries like a traumatic brain injury or spinal cord injury. Decide on a schedule that works for you, whether it’s daily, a few times a week, or even just once a week to start. Set aside a specific time each day for your practice, whether it’s first thing in the morning to energize your day, during a lunch break to refresh your mind, or in the evening to unwind before bed. Incorporating chair yoga into your routine can be particularly beneficial for those with multiple sclerosis or cerebral palsy, as it offers a safe yoga practice that adapts to your unique needs. The key is to make your chair yoga practice a regular part of your routine, so it becomes a habit that you look forward to and a vital part of your overall yoga.
Starting Small and Building Gradually:
Incorporating Yoga into Daily Life
Practicing Chair Yoga Throughout the Day: One of the unique benefits of adaptive chair yoga is that it can be easily integrated into your daily life, even for those with conditions like multiple sclerosis, cerebral palsy, or a spinal cord injury. You don’t need a lot of time or space—just a few minutes here and there can make a big difference. Consider practicing a quick Seated Forward Bend or Shoulder Rolls during a work break, or using breathing exercises to manage stress during a busy day. By weaving chair yoga into your daily routine, you can stay active and mindful no matter where you are, promoting physical well-being and supporting your mental and emotional health.
Using Chair Yoga as a Tool for Mindfulness: Chair yoga isn’t just about physical movement; it’s also a powerful tool for cultivating mindfulness and reducing stress. As you practice, focus on being fully present in each pose, paying attention to your breath, and tuning in to how your body feels. This mindful movement approach can help you carry the benefits of yoga off the mat and into other areas of your life, improving your mental clarity, emotional resilience, and overall sense of peace. This is particularly beneficial for individuals with traumatic brain injuries who are looking for safe yoga practices to improve their well-being.
Conclusion
Building a regular chair yoga practice is a journey towards better physical health, mental clarity, and emotional balance. By creating a personalized routine, combining chair yoga with other forms of yoga, and incorporating it into your daily life, you can make chair yoga an integral part of your well-being. Remember, the most important part of any yoga practice is consistency and compassion—be kind to yourself as you explore and grow in your practice, and celebrate the progress you make along the way. With regular chair yoga, you can enjoy a more flexible, strong, and peaceful life, one breath and movement at a time. For more yoga and meditation resources check out https://harmonycentered.com/.


