Week 1: Free Yoga Course for Beginners | Adaptive Yoga Poses
Adaptive Yoga for Beginners: Introductory Poses for All Abilities
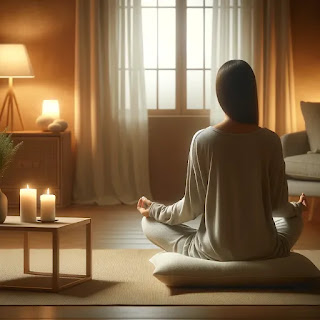
Welcome to Week 1 of our free adaptive yoga course! I’m so excited to have you here as we begin this journey together. Over the next six weeks, we’ll explore how yoga can be adapted to meet your unique needs and abilities, ensuring that everyone, no matter their fitness level or experience, can benefit from this transformative practice.

This first week is all about getting comfortable with the basics. We’ll be focusing on three foundational poses—Seated Mountain, Seated Forward Fold, and gentle neck stretches—that will help you build awareness of your body and breath. These poses are designed to be accessible to all, and I’ll walk you through some simple modifications so you can tailor the practice to your own body.
Remember, yoga is not about forcing yourself into a pose but about finding what feels good and works for you. As we move through this first week, keep in mind that the goal is to move with care and compassion. By the end of the week, you’ll feel more confident and connected to your body, and ready to build on that foundation as we move forward.
Important Safety Note
Before beginning this or any exercise program, it’s important to consult with your doctor or healthcare provider, especially if you have any pre-existing health conditions, injuries, or concerns. The adaptive yoga poses in this series are designed to be gentle and supportive, but every body is different, and some movements may not be suitable for everyone. Please listen to your body and modify the poses as needed to avoid injury. If at any point you experience pain, stop immediately and consult with a healthcare professional. By following this series, you agree to perform these exercises at your own risk.
Let’s get started!

Why Adaptive Yoga?
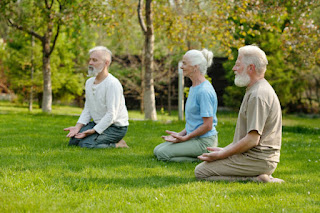
Adaptive yoga is all about making yoga accessible to everyone, regardless of physical ability, flexibility, or fitness level. Whether you’re new to yoga or returning to it after a break, adaptive yoga offers an inclusive approach that allows you to tailor poses to your body’s unique needs. This practice is not about pushing yourself beyond your limits, but about working with your body where it is today.
One of the great things about adaptive yoga is that it meets you where you are. You don’t need to be flexible, strong, or in peak physical condition to start. Maybe you’re worried about not being able to do certain poses, or perhaps you’ve been dealing with mobility issues or chronic pain. Adaptive yoga takes those concerns and transforms them into possibilities, offering modifications that make every pose achievable.
The poses we’ll cover this week are foundational and gentle, perfect for building your confidence as you begin your yoga journey. You’ll learn how to adapt each movement in a way that suits your body, without the pressure of meeting any external expectations. As we go along, you’ll discover that yoga is more than just physical poses—it’s about connecting with your breath, finding inner peace, and creating a practice that serves you.
The beauty of adaptive yoga is that it allows everyone, regardless of experience or ability, to access the benefits of yoga. It’s a practice built on self-compassion, mindfulness, and acceptance, giving you the tools to listen to your body and respect its boundaries.
Week 1 Yoga Flow
This week, we’re focusing on three foundational yoga poses that anyone can try, regardless of fitness level or experience. Each of these poses has been carefully chosen to help you ease into your practice while building awareness of your body and breath. Here’s a quick overview of the poses we’ll be practicing:
- Seated Mountain Pose (Tadasana)
- This pose is all about posture and alignment. It helps you establish a strong, grounded foundation, both physically and mentally, by focusing on the length of your spine and the steadiness of your breath. You’ll learn to sit tall and feel the connection between your body and breath.
- Seated Forward Fold (Paschimottanasana)
- A gentle forward bend that encourages flexibility in the hamstrings and lower back. This pose is great for promoting relaxation and releasing tension. Don’t worry if you can’t reach your toes—this pose can be easily modified to suit your level of flexibility.
- Gentle Neck Stretches
- These simple stretches help relieve tension in the neck and shoulders, which is common in our day-to-day lives. These stretches will help improve mobility and release any tightness that might be limiting your range of motion.
Each of these poses can be modified to fit your needs, whether you’re sitting in a chair, using props, or just starting out. In the sections that follow, we’ll go through how to get into each pose step-by-step, along with adaptations to ensure you feel comfortable and supported throughout your practice.
Seated Mountain Pose (Tadasana)
How to Do It (Seated):
- Sit on a sturdy chair with feet flat on the floor, hip-width apart.
- Place your hands on your thighs or let them hang naturally at your sides.
- Focus on lengthening your spine, sitting tall, and engaging your core slightly to support good posture.
- Relax your shoulders away from your ears and gaze forward.
- Breathe deeply, allowing your breath to create space in your chest and spine.
How to Do It (Standing):
- Stand with feet hip-width apart, arms at your sides.
- Press evenly through both feet, feeling grounded.
- Engage your thighs and core muscles to support a strong, stable stance.
- Lengthen your spine and lift through the top of your head.
- Relax your shoulders, and breathe deeply.
Adaptations:
- For Wheelchair Users or Those with Mobility Issues: Sit on a chair with a backrest for extra support, or use armrests to help maintain an upright position.
- For People with Limited Core Strength: Use a small pillow or rolled towel behind your back to support the spine. If standing is difficult, use a wall for balance, resting your back gently against it.
- For Those with Limited Lower Body Mobility: Place a rolled towel or block under the feet to help create a stable connection to the floor.
- For Bedridden Individuals: This pose can be done lying on the back. Focus on lengthening the spine while lying flat, with the arms resting by the sides and feet pointed toward the ceiling.
Seated Forward Fold (Paschimottanasana)
How to Do It (Seated):
- Sit on a chair with both feet flat on the floor.
- On an exhale, gently fold forward from your hips, leading with your chest, and rest your hands on your thighs, shins, or feet.
- Keep your spine as straight as possible, only bending to where it feels comfortable.
- Relax your head and neck, allowing gravity to help you stretch.
- Slowly roll back up to a seated position when finished.
How to Do It (Standing):
- Stand with feet hip-width apart.
- On an exhale, gently hinge at the hips and lower your torso toward the ground.
- Let your hands dangle or rest them on your shins or a chair for support.
- Keep your knees slightly bent if necessary to avoid strain.
- Slowly roll up to a standing position when done.
Adaptations:
- For Wheelchair Users or Limited Mobility: If folding forward is challenging, place a bolster or pillow on your lap and fold onto it for a gentler stretch. You can also place your hands on a table in front of you for support.
- For Limited Flexibility: Use a yoga strap or belt around your feet to help guide you into the forward fold without overstretching. Keep your hands on your thighs or knees if reaching forward is difficult.
- For Bedridden Individuals: Lie on your back and lift your legs up toward the ceiling (as much as is comfortable) while gently holding behind your knees or using a strap around your feet.
- For Neck or Back Sensitivity: Keep your back as straight as possible, and only fold forward to the degree that feels good. You can rest your arms on a chair in front of you or on your thighs.

Gentle Neck Stretches
How to Do It (Seated):
- Sit with feet flat on the floor and spine lengthened.
- Slowly bring your right ear toward your right shoulder, keeping the shoulders relaxed.
- Hold for a few breaths, then return to center and switch to the other side.
- For an extra stretch, gently place your hand on top of your head for added weight, but don’t apply pressure.
How to Do It (Standing):
- Stand with feet hip-width apart and arms hanging loosely at your sides.
- Bring your right ear toward your right shoulder, keeping your shoulders relaxed.
- Hold the stretch, then repeat on the other side.
Adaptations:
- For Wheelchair Users or People with Reduced Mobility: Stay seated in your chair and focus on small, gentle movements. Avoid over-extending if there’s neck tension or discomfort. If your shoulders tend to hunch, rest your arms on the chair or lap to stabilize the stretch.
- For Limited Range of Motion in the Neck: Perform smaller movements and avoid forcing the neck beyond its comfort zone. You can also lie down and focus on gently tilting your head from side to side while supported by pillows.
- For Those with Severe Mobility Limitations: Perform these stretches while lying on your back, focusing on relaxing the neck muscles. A soft towel or small pillow can be placed under the neck for extra support.
By including these adaptations, you ensure that anyone—whether they’re seated, standing, or even bedridden—can benefit from these foundational yoga poses. The key here is to create a practice that feels comfortable and accessible for all bodies and abilities.
Modifying Poses for Your Needs
Yoga is a deeply personal practice, and one of the most important things to remember is that it’s not about how the poses look—it’s about how they feel in your body. Modifications are not just for beginners; they’re a way to make yoga work for you, no matter your age, ability, or level of flexibility.
By using props like straps, blocks, pillows, or even walls, you can adjust each pose to suit your unique needs. For example:
- Straps can help you reach for your feet in a forward fold without straining your back or hamstrings.
- Blocks can support you in a seated position, giving you more height and making it easier to stay upright.
- Pillows provide additional comfort and support when you need a softer base or help with balance.
- Walls can offer stability in standing poses, giving you confidence to move without fear of falling.
The key to modifying your practice is to listen to your body. If something feels uncomfortable or painful, stop and adjust. Yoga should never cause pain, and there is no “right” or “perfect” way to do a pose. Honor where you are today, and know that each practice is an opportunity to explore and discover what works best for you. As you progress, you may find that some modifications are no longer needed, but they’ll always be there for support when you need them.
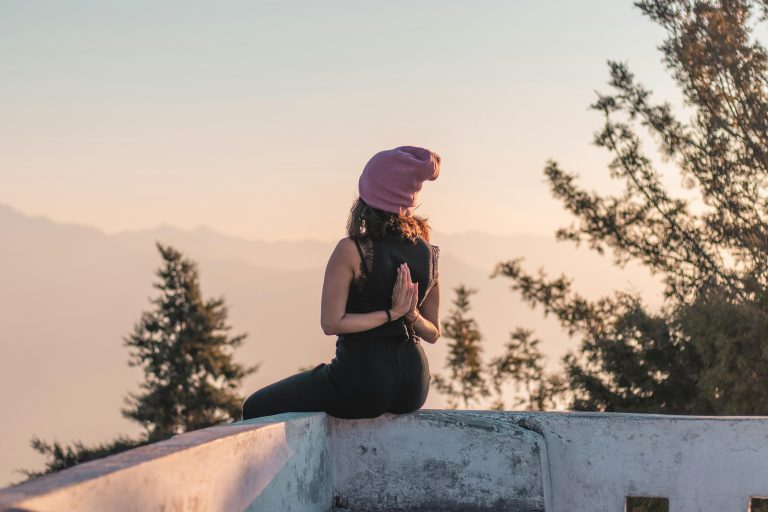
Focus on Breath Awareness
One of the core principles of yoga is the connection between movement and breath. In adaptive yoga, breath becomes even more important, as it helps you stay present and focused while moving gently and with intention. As you practice the poses in Week 1, try to bring your attention to your breath:
- Inhale deeply to create space in your body, and exhale to release tension.
- As you move into each pose, let your breath guide the movement. For example, inhale as you lengthen your spine in Seated Mountain Pose, and exhale as you fold forward in Seated Forward Fold.
- If you find your mind wandering or you’re feeling discomfort in a pose, come back to your breath. It’s a powerful tool for grounding yourself in the present moment and finding ease in your practice.
For beginners, simply learning to breathe deeply and in sync with your movements can be transformative. It helps reduce stress, enhances focus, and encourages you to tune in to what your body needs. As we progress through the series, we’ll continue to build on this connection between breath and movement, making it a core part of your yoga practice.

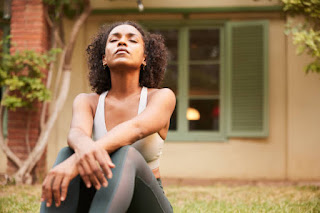
Practice Tips for Beginners
As you begin your first week of adaptive yoga, it’s important to approach your practice with patience and self-compassion. Yoga is about creating space for yourself to grow and adapt, no matter where you’re starting from. Be kind to yourself and embrace this journey without any pressure to be perfect in the poses.
To get the most out of this week, I encourage you to practice this simple sequence each day for just 5-10 minutes. Consistency is key to seeing and feeling the benefits of yoga, and by incorporating these poses into your daily routine, you’ll start to build a solid foundation for the weeks to come. This regular practice will help prepare your body for Week 2, which will be slightly more challenging but still accessible.
You can fit this sequence into your day in whatever way works best for you:
- As a way to gently start your morning and get your body moving,
- A mid-day pick-me-up to re-energize and reset,
- Or a calming evening flow to help you wind down and prepare for a restful night’s sleep.
The best part is that yoga can easily become a flexible part of your routine. Whether you practice in the morning, afternoon, or evening, the important thing is to show up consistently. With each day, you’ll start to feel more comfortable in the poses, improve your breath awareness, and notice how your body responds.
Remember, yoga is a personal journey, and what works for you might be different from someone else. Listen to your body, and allow this practice to fit into your life in a way that feels good and sustainable. Each time you return to the mat, you’re taking a step toward greater awareness and well-being.

Building Consistency in Adaptive Yoga: Reflect and Prepare for Week 2
As we wrap up Week 1, I encourage you to practice these poses regularly throughout the week. Even just a few minutes each day can make a big difference in how you feel physically and mentally. Take note of any changes—do you feel more relaxed, aware of your body, or connected to your breath? Reflect on how this practice impacts not only your body but also your overall well-being.
I’d love to hear about your experience! Feel free to share your thoughts, questions, or any challenges you might have faced in the comments below. Whether you’re new to yoga or have been practicing for a while, your insights could help others on their journey as well. Let’s build a supportive community together.
Next week, we’ll be taking things up a notch with more dynamic poses that will challenge your strength and balance, but don’t worry—everything will still be adaptable to meet you where you are. In Week 2, we’ll build on the foundation you’ve created this week, continuing to deepen your connection to your body and breath. Stay tuned for more tips on how to modify and personalize your practice!
If you missed the introduction to this series, [link to introduction], or want to revisit Week 1 as you progress, [link to Week 1]. I’ll see you next Thursday for Week 2 of our adaptive yoga series!